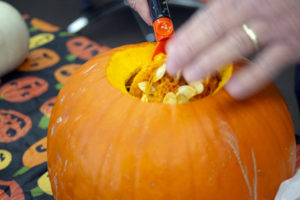
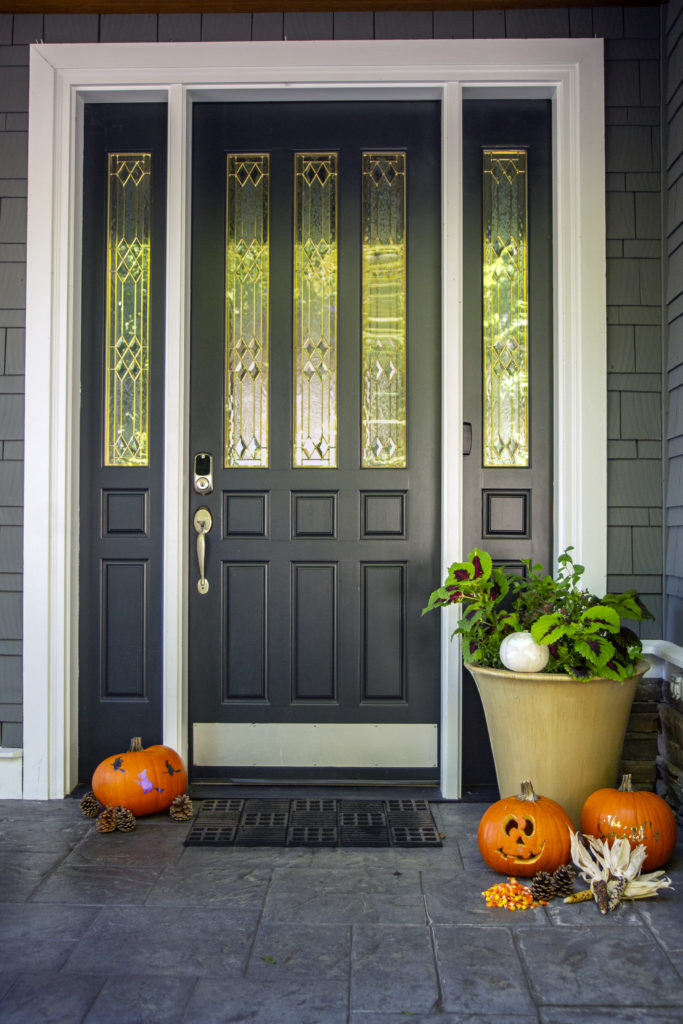
There’s more than one way to trick out that Halloween pumpkin! Forget free-handing the same ol’ Jack’O’Lantern grin on the pumpkin this year with a magic marker, scooping out the guts with a rusty spoon, and carving it up with that dull old kitchen butcher knife.
Put your vinyl cutter to work this Halloween for scary professional results. Here are 3 different ways (and there could be many more!) to trick out that orange (or white) porch-piece this holiday, using adhesive vinyl, stencil, and other USCutter products!
More than one way to skin a (black) cat. Here are 3 alternate pumpkin decorating strategies!
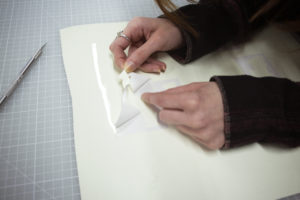
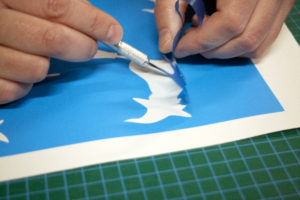
1. The (Somewhat) Traditional Approach. Cut an outline for easy carving with Oramask 813 Paint Stencil!
Step 1: Scoop out the guts!Step 2; Design or find a vector. Google “free Halloween vectors”!Step 3: Mask your Oramask 813 paint stencil with medium-tack transfer tape!Step 4: Carefully apply to a washed pumpkin surface!Step 5: Use your handy pumpkin saw to carve out the exposed flesh!Step 6: Voila! So easy!
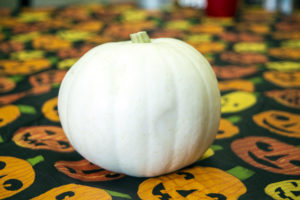
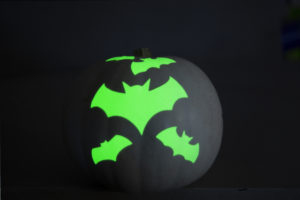
2. Decorate your pumpkin with adhesive vinyl decals. Gold Leaf adds a touch of class. Glow-in-the-Dark Siser EasyPSV adds some eerie ambiance to this Snowbaby pumpkin!
Step 1: Cut and weed Siser EasyPSV Glow-in-the-Dark. We used bats!Step 2: Find a scary blank white canvas Snowbaby pumpkin!Step 3: Charge the receptors in the vinyl in light. Then watch it light up at night!Step 4: Get a distinguished look with this Gold-Leaf style Griff vinyl!
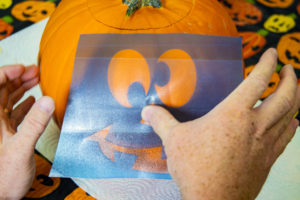
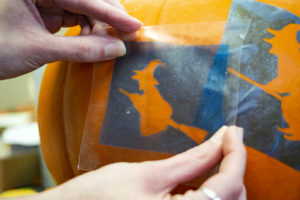
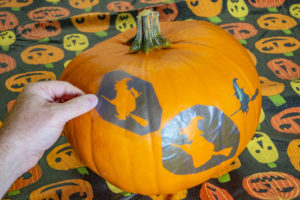
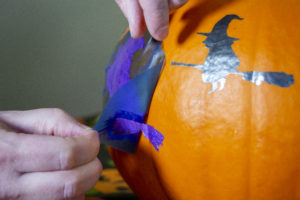
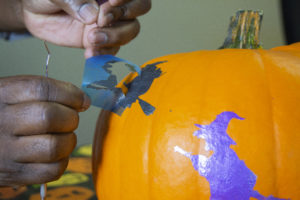
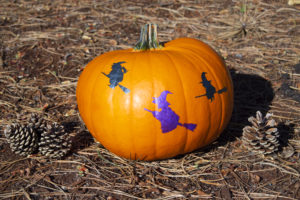
3. The Pro Level. Paint your own pumpkin with Oramask 813 paint mask stencil for a fabulous looking porch piece that won’t rot!
Step 1: Weed your witch! Find your free vector of choice or make your own!Step 2: Apply the weeded stencil to the washed pumpkin!Step 3: Draw the eye with some movement of multiple designs!Step 4: Dab a conservative amount of acrylic craft paint through the stencil onto the clean surface!Step 5: Saturate the exposed pumpkin so no orange peeks through. REMOVE THE STENCIL IMMEDIATELY WHILE THE PAINT IS STILL WET!Step 6: If you don’t the paint will bond to the stencil as it cures and it will all rip off together!Step 7: It’s an amazingly beautiful pumpkin!HAPPY HALLOWEEN!
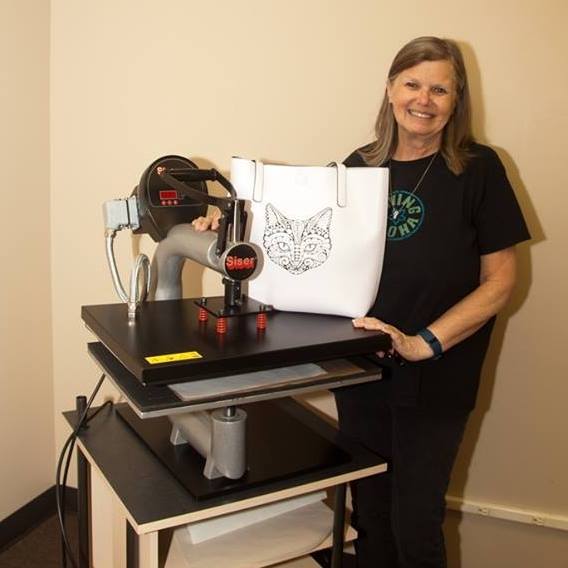
USCutter.com is a lot of things to a lot of people, but life-changing? That may seem like a stretch, but for one of our customers, Susan Dillon, of the Seattle area, it rings true. We interviewed Susan recently about how personally enriching she’s found it’s been for her to work her way through many of our equipment paths for one-of-a-kind custom gifts for family and friends, and maybe even some products for sale!
Susan pictured with the free Siser heat press she won at a recent event!
1.) Has USCutter changed your life? Please tell us how.
Susan: Oh it sure has! The first time I went to the Redmond location, it was for a trade show. I was curious about the printer I had read about for sublimation. I put my name in the bowl for a raffle and was totally shocked to win the grand prize of a Siser Heat Press! We barely got it in my little car and my kitchen wasn’t really big enough to house the heat press (or the sublimation printer set up I got that day too) so we built a full studio building (she shed) and I went from cutting a few things with my home crafting cutter to a complete vinyl and sublimation studio. I’ve also now added a larger 30” cutter and white toner printer.
2.) What are you doing in dye-sublimation printing these days? Do you use a wide variety of blanks? Do you do any photos or fine art images?
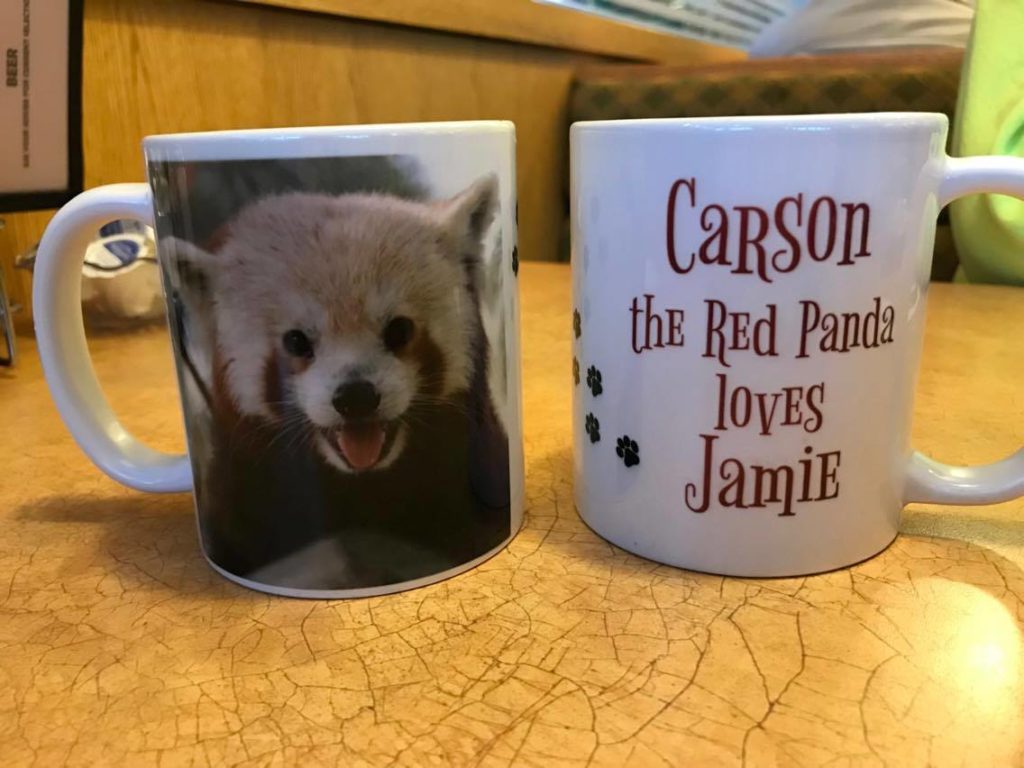
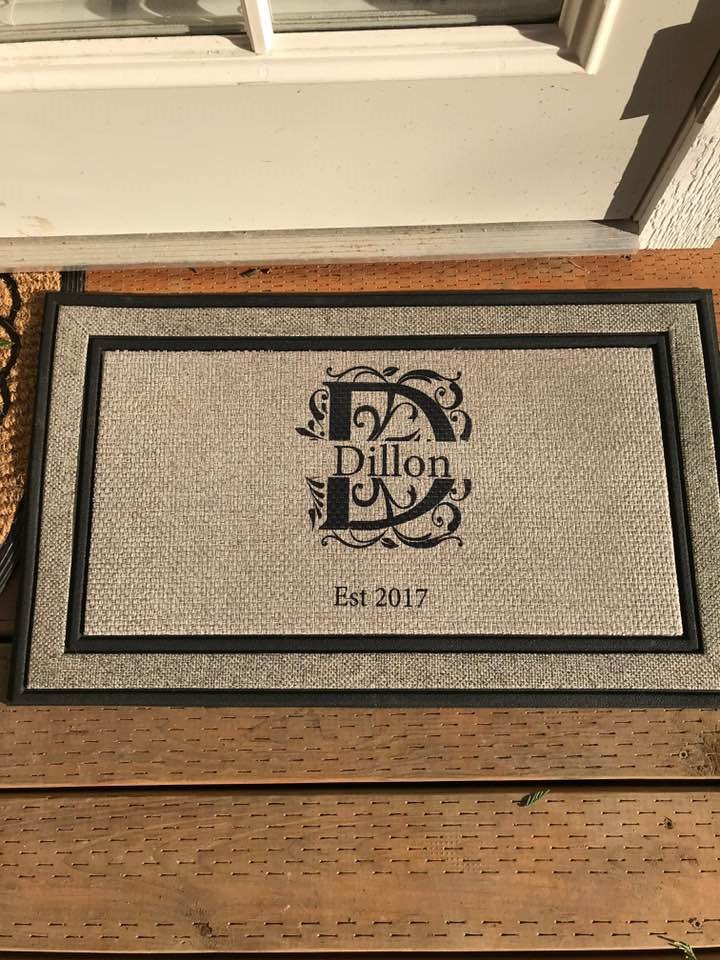
Susan: I’ve done all kinds of project with sublimation. I love it! It’s so wonderful to be able to create one of a kind personalized items in no time at all. My favorite are coffee mugs and those are my most requested items, but I use many types of blanks. I’ve done water bottles, ceramic Christmas ornaments, shirts, mouse pads, door mats, water bottles, and sequin pillows and Christmas stockings for example. If it’s polyester, I will try to sublimate on it!
Photo images and fonts are easy with dye-sublimation printing!
3.) Do you mainly use USCutter products for business or pleasure?
Susan: My business is still considered a hobby. I have a business name but I keep busy with orders from friends at this point. Right now I’m working on 2 weddings. (I also do custom machine embroidery and have some orders for that too.) But I get all my supplies from USCutter – unless it’s something they don’t carry – then I will purchase elsewhere, but USCutter is always my first go to place for supplies. (I have an order waiting for me right now!)
Vinyl makes it easy to add a professional touch to any art piece.
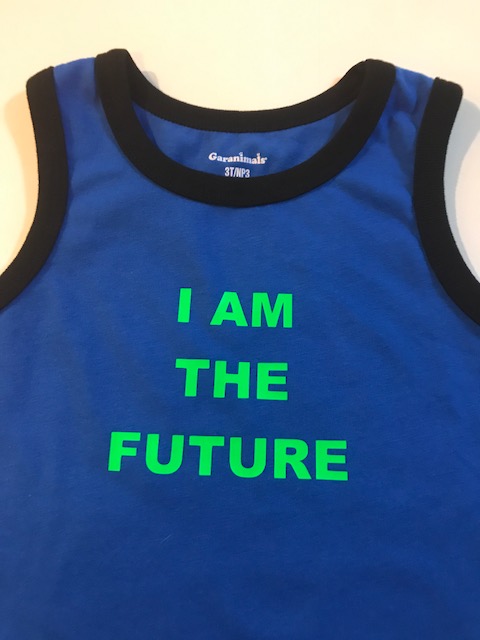
4.) What advice would you give to someone starting out using heat transfer vinyl on apparel?
Susan: My best advice would be to be prepared to make mistakes. They happen! Don’t get frustrated when they do. Forgetting to mirror image when cutting is something everyone does! Use white uncoated butcher paper to cover the transfers on the heat press. To make sure the transfer is properly adhered to the fabric, look closely at the largest part of the transfer. You should be able to see the bumps of the fabric where the HTV has “melted” into the fabric. I always do an extra press after I take off the transfer sheet with a layer of butcher paper over the design just to be sure it’s stuck. The final advice though is to have fun and enjoy what you’re doing!
Think outside the shirt! This tank would be perfect for a toddler!WELCOME to a new world of opportunity with products from USCutter!