“Sometimes, you want to crop around an image with a complex shape. Most people do this in Adobe® Photoshop® or another image-editing program, but you can do it in PowerPoint if you don’t have or know another program…”
Eliminate unwanted background with PowerPoint!
This blog from Ellen Finkelstein walks Mac users of PowerPoint 2003 through the process of drawing in an outline of the image they’d like to isolate in a photo and eliminating the unwanted background, so that they can subsequently convert it into a vector design in their cutting software.
Stay tuned in the weeks to follow, and we’ll show you a great possible application of this technique, which uses vinyl and looks great, and could even make you a little bit of money.
Making multi-color designs on shirts and other fabrics with heat transfer vinyl is an inexpensive alternative to printing, whether it’s dye-sublimation or Joto paper, or solvent/latex on printable HTV.
Layer Siser EasyWeed for snazzy intricate multi-color designs.
It’s pretty easy to do in the software (RazorCut allows you to separate cutting jobs by color in its spooling function) so you don’t have to switch out rolls of different-colored vinyl to do multiple jobs that contain the same color.
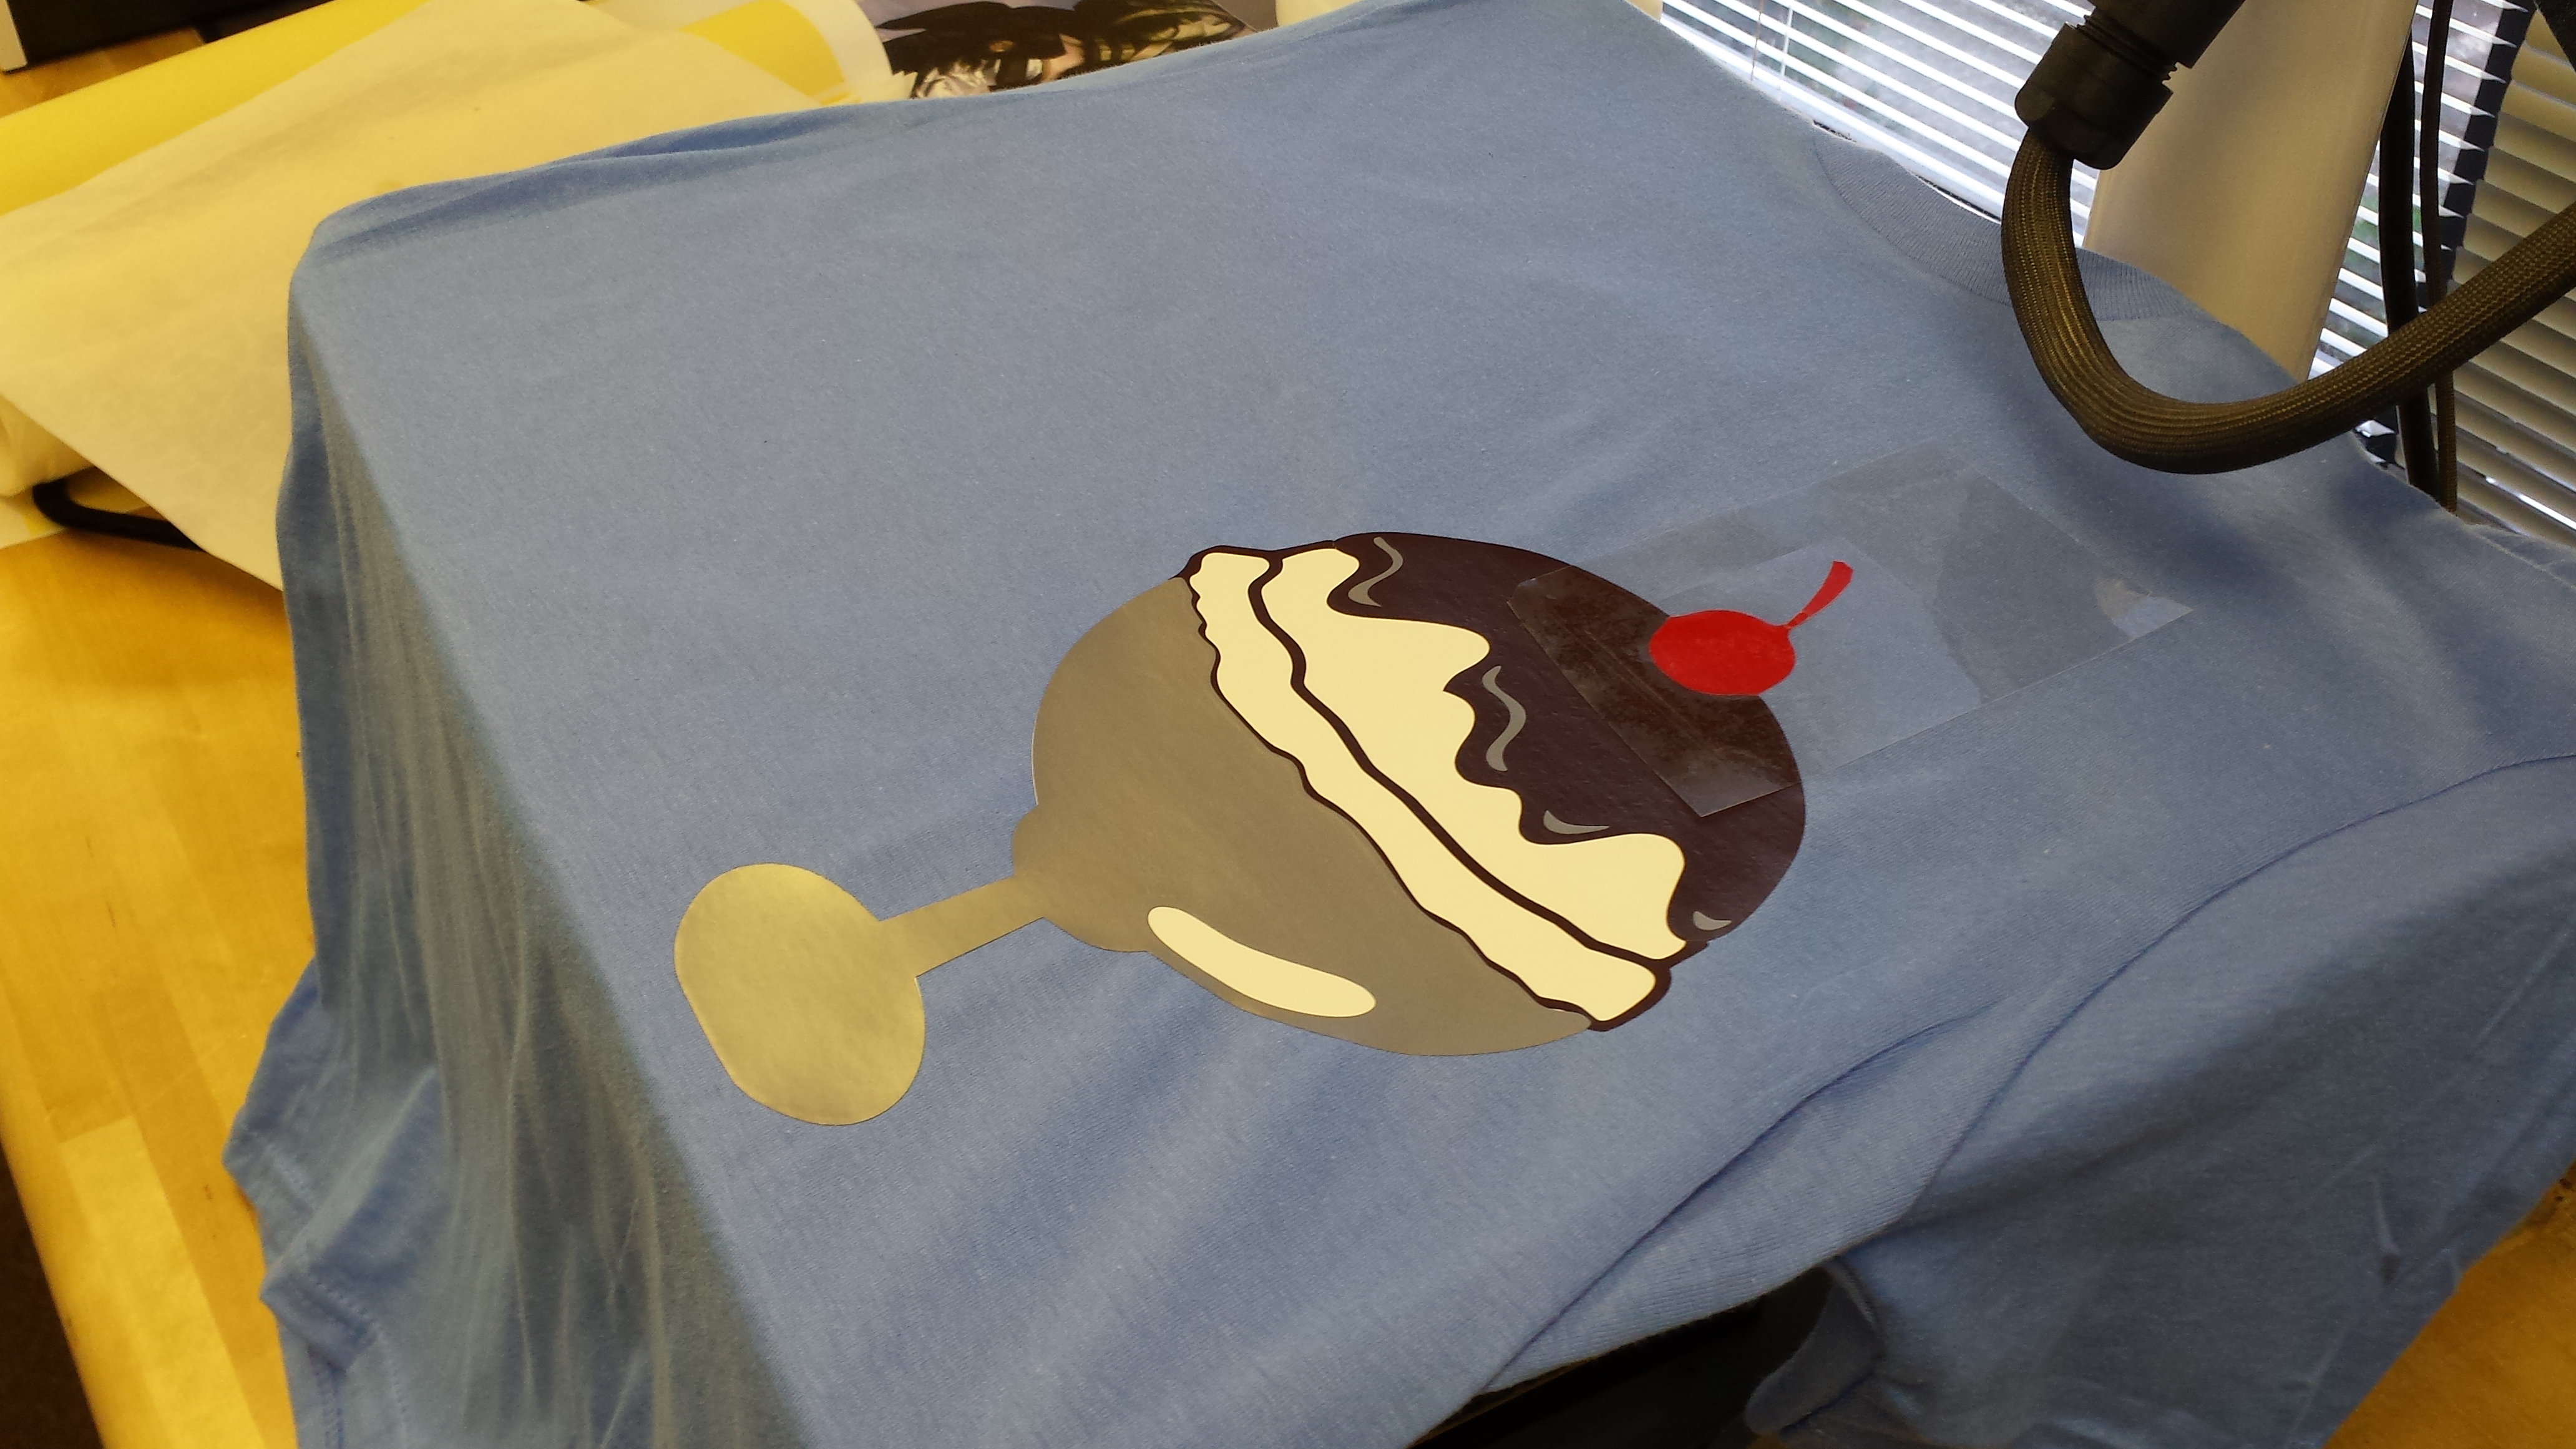
Siser EasyWeed (order NOW by the foot!) can be layered in different colors, with 3 or more layers posing no real problem in terms of difficulty or washability. In the first example shown here, we tried to make a hot fudge sundae decal. It works best for ease of registration to layer sequentially with solid-filled colors. First we chose our image, and then added a white outline around it. This solid-filled white outline became the base. Then we added the silver base and streaks (Siser Easyweed is very easy to register due to its see-through plastic backer-careful not to cut through it with too deep a blade setting), followed by the brown chocolate sauce, and lastly a cherry on top.
Lastly, the cherry on top.
Each layer we pressed for 3 seconds at 320 degrees until the final layer, which received the whole 15 seconds.
For a softer layered look (layers within layers) we also tried the new Chemica DuoFlex (also available NOW by the foot in 4 styles!) which is a two-tone vinyl that shows an accented “outline” when pressed onto a shirt. It is very soft and flexible, making it easy to work with. Like Siser EasyWeed, you cut mirror, into the unfinished colored side. For a cleaner cut, you should choose the “Multi-Cut” feature in your software as it’s thicker and softer than most vinyl. Pressure should be set to light, heat to 320 degrees, for 20 seconds.
Note: If you go with a longer time and lower heat, the material appears to have even more dimensionality and softness of texture.
REMEMBER TO COLD PEEL!
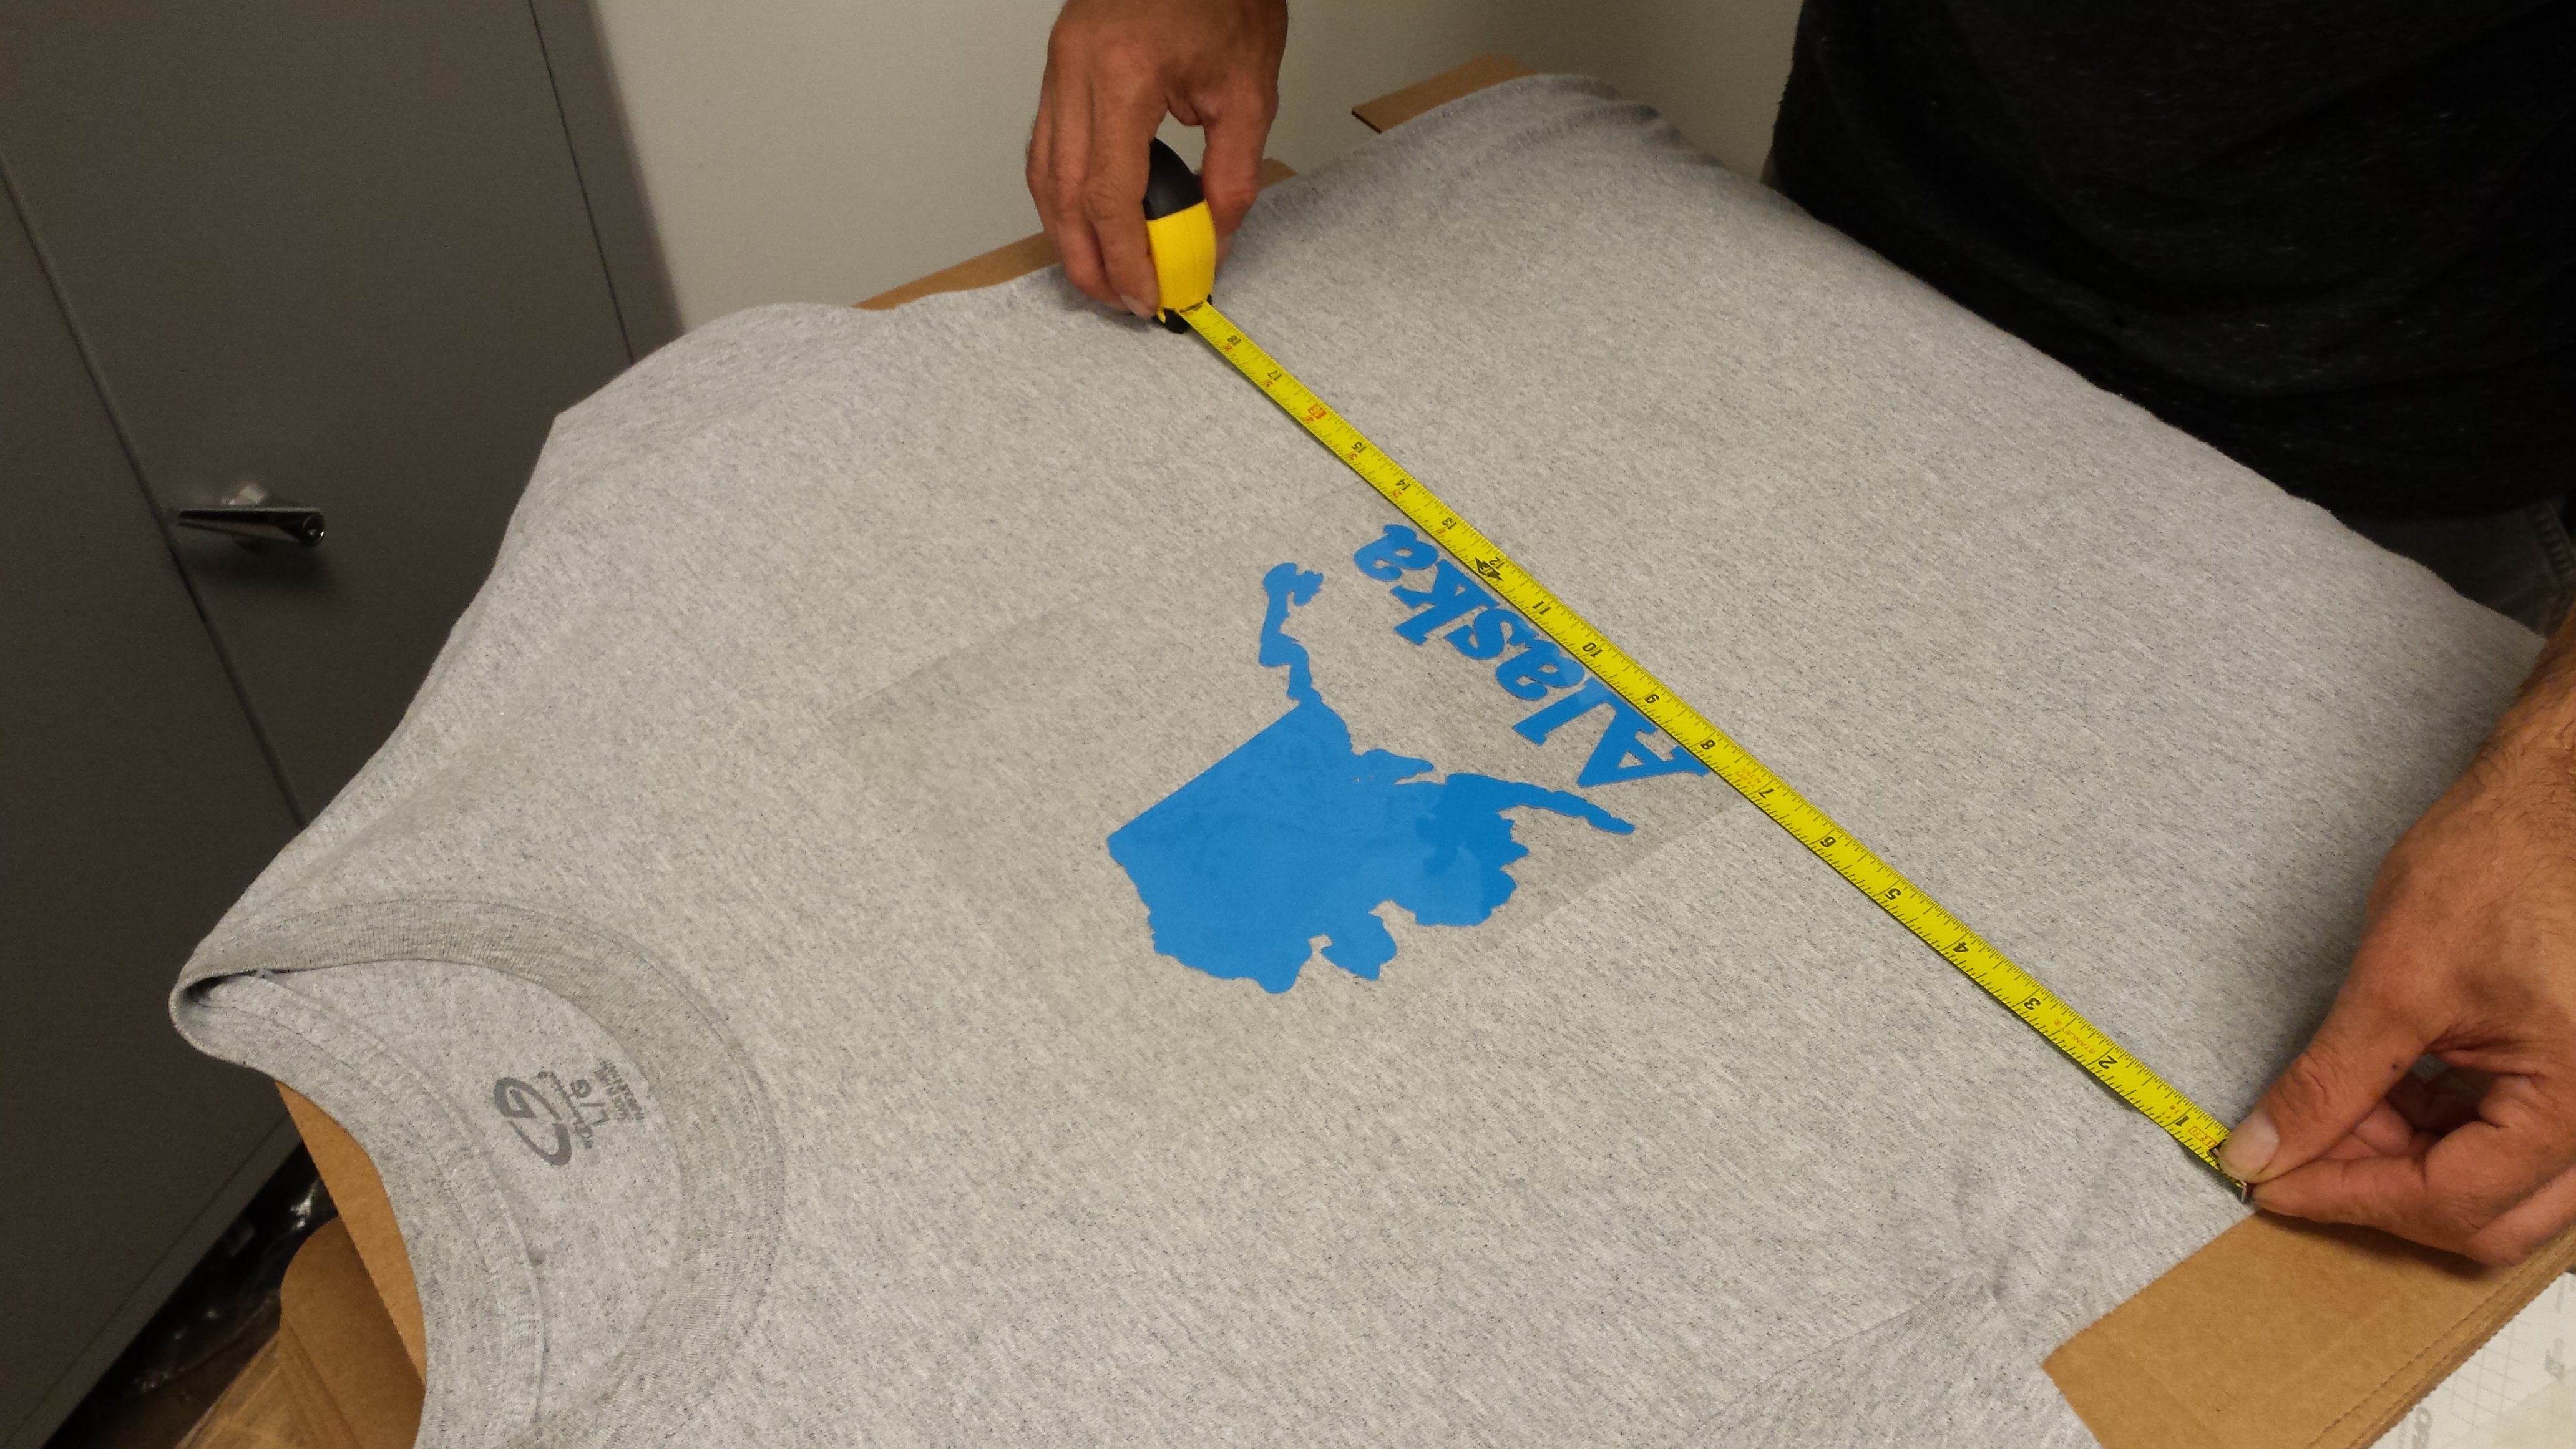
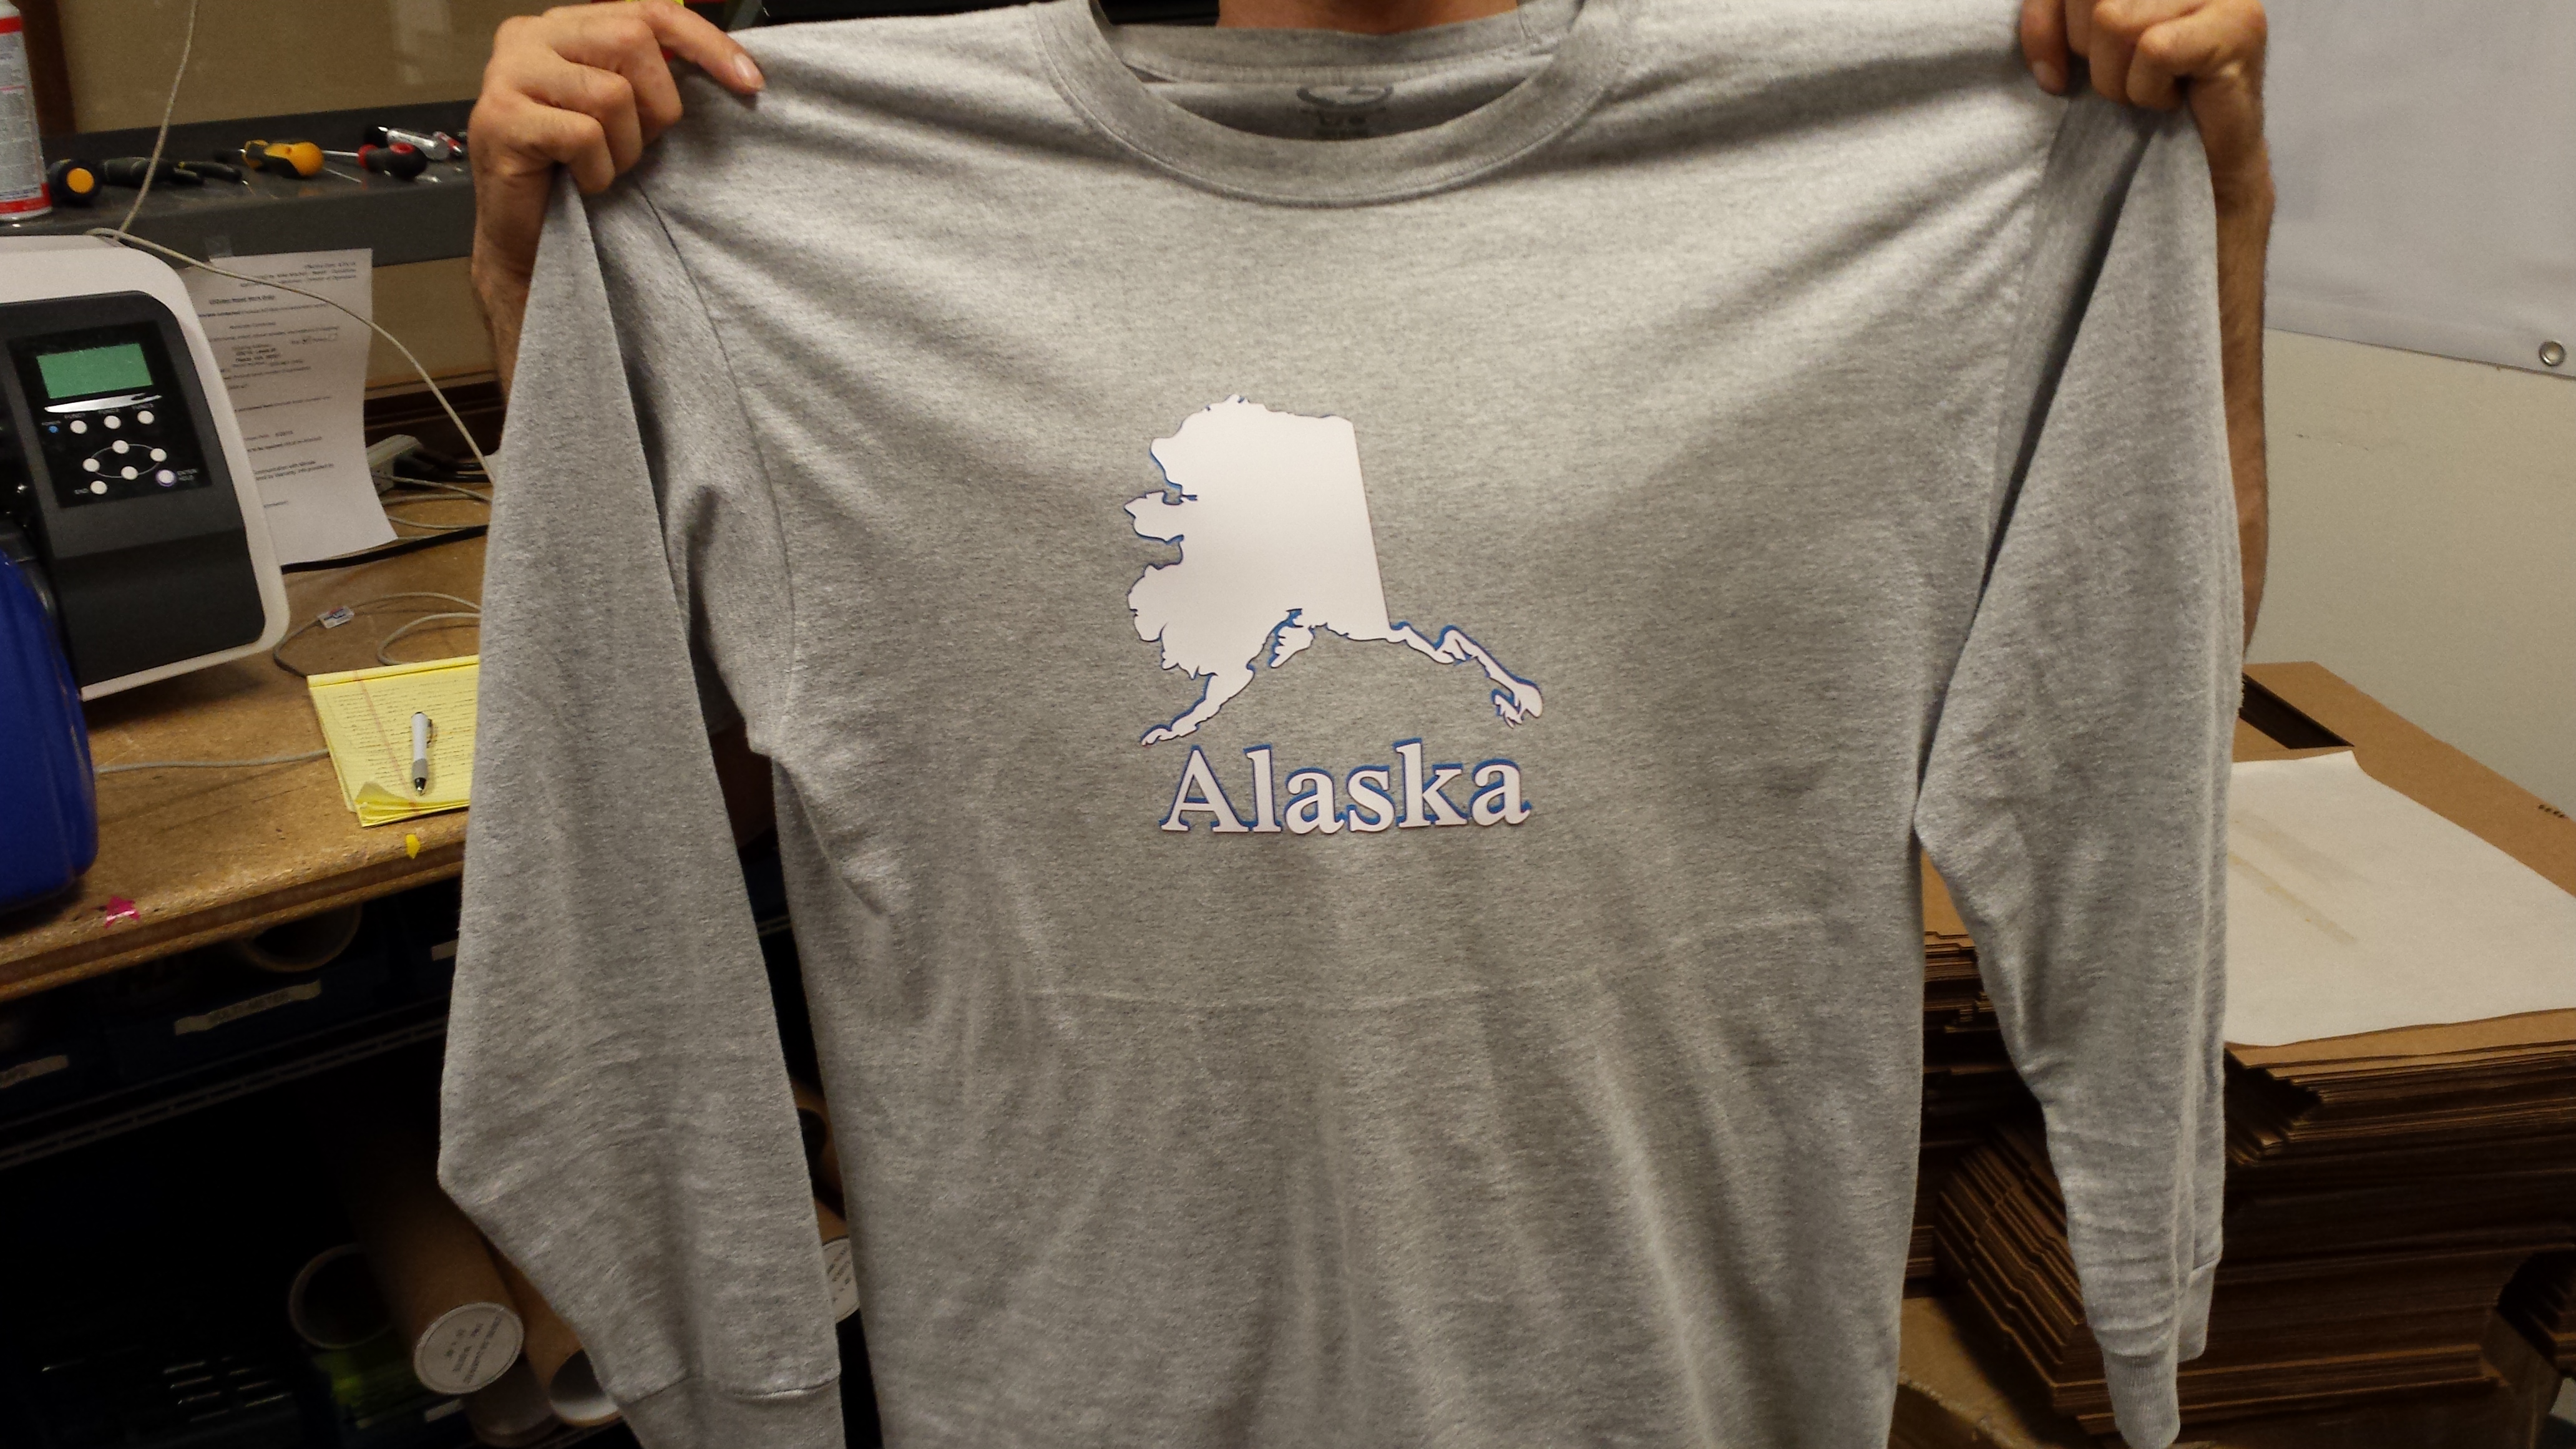
In this other example, we show the results of layering DuoFlex onto a slightly larger blue EasyWeed base.
Positioning is important to get right before the press.
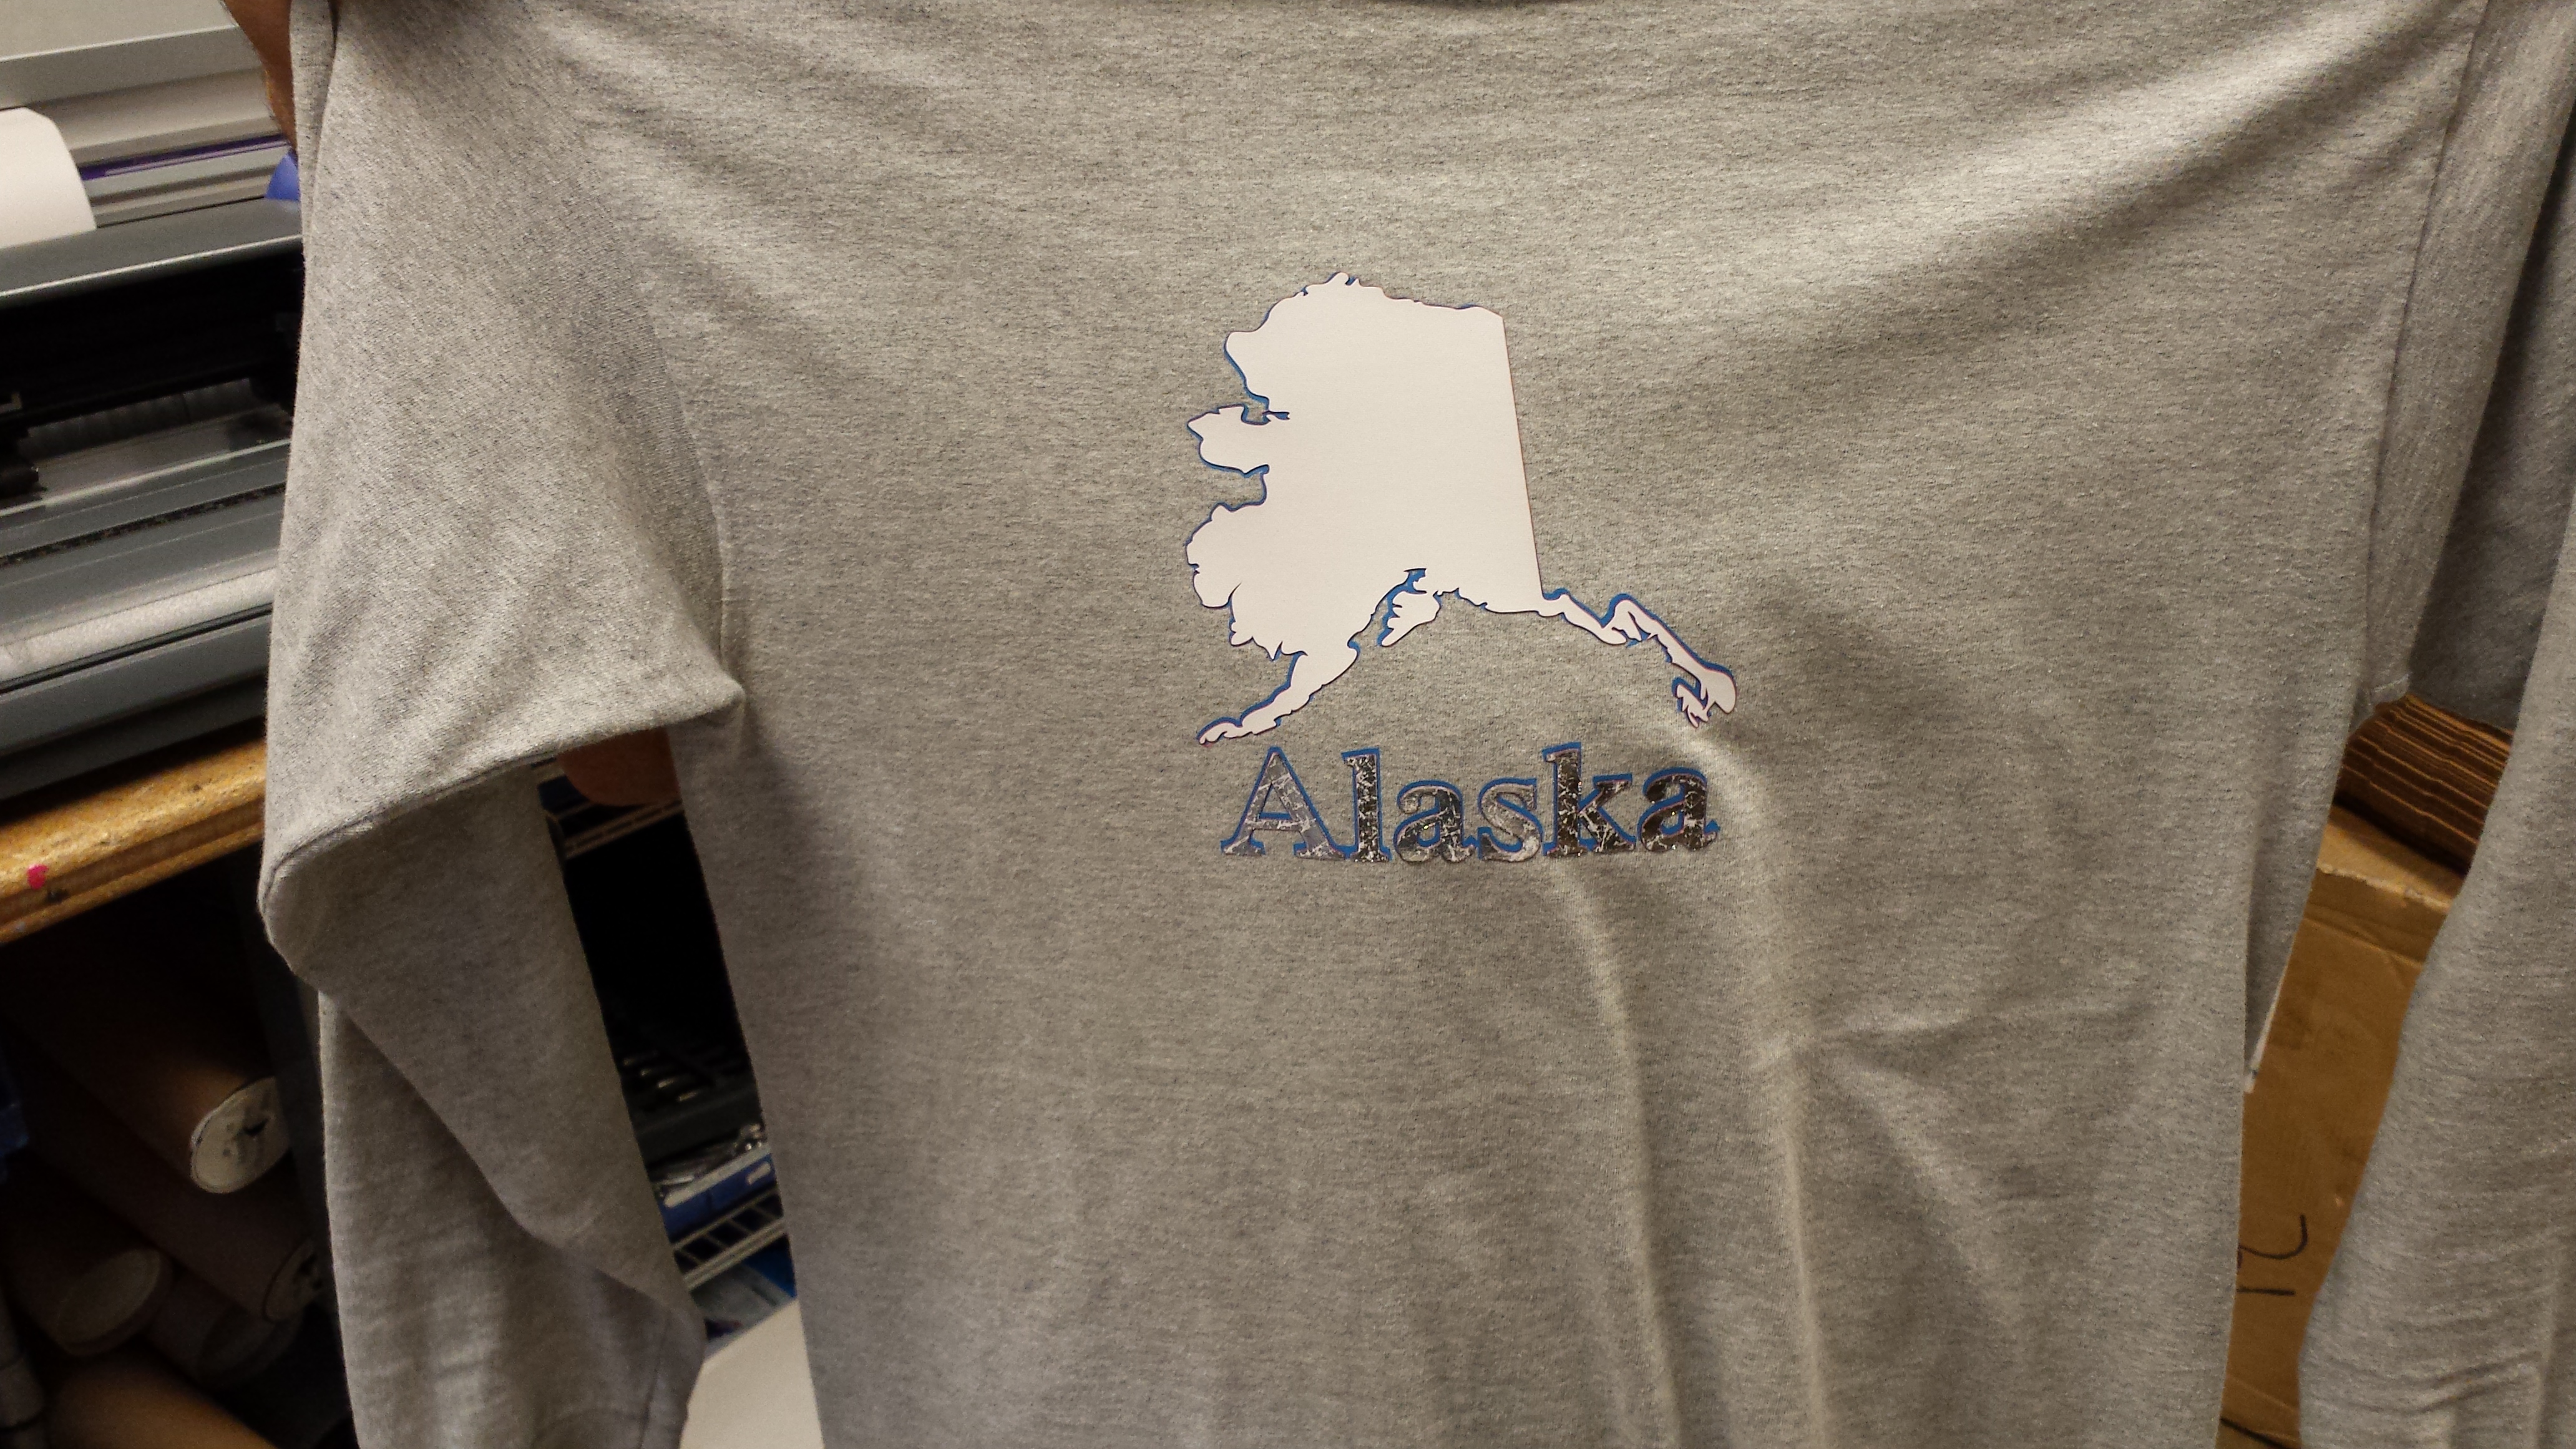
It can be a little harder to register, but notice the red and blue layers and the bright white on top that is washable again and again with a very soft hand for a very red-white-and-blue Alaskan experience.
White on the surface. Like the real Alaska.
Not a big fan of white on top?
Press on some screenprinting foil for a distressed metallic look
We followed up on the lettering with a strip of screen-printing foil all crinkled up to provide a distressed look, and as you can see that turned out very appealing as well.
These two experiments in heat transfer vinyl show, that if nothing else, there’s no end to the different effects and textures possible once you start piling on the layers.
In a previous episode, we saw the beautiful potential of dye-sub printing onto GreenStar Clear Adhesive Vinyl for decorations behind or under glass.
In this episode, we’re looking for a few good entrepreneurs for our sublimation shark tank. We’ll even provide the idea.
This video shows you all the steps, and details all the materials and equipment you’ll need (click here for the bundle available now!), for the process of printing vinyl menus to be placed under glass or on outward-facing windows.
They’re indestructible. They’re covered by glass. They look great. Watch the video and look at the pictures. They’re cheap-we did the math and one menu costs 40 cents. You can put games on it and draw on them, then erase it away. It’s easily removable without residue. You can change them out every week with new menu items, at a fraction of the cost of printing a new batch of traditional paper menus.